
Glove Bags


Asbestos fibers have long been recognized as a hazardous material. When removing asbestos insulation from pipes, glovebags provide an effective and practical solution. Proper use of asbestos glove bags helps protect workers from exposure risks and is also essential for meeting OSHA and other regulatory compliance requirements. In this blog, we’ll walk you through the correct and safe use of asbestos glove bags, helping you stay protected and compliant during asbestos removal projects.
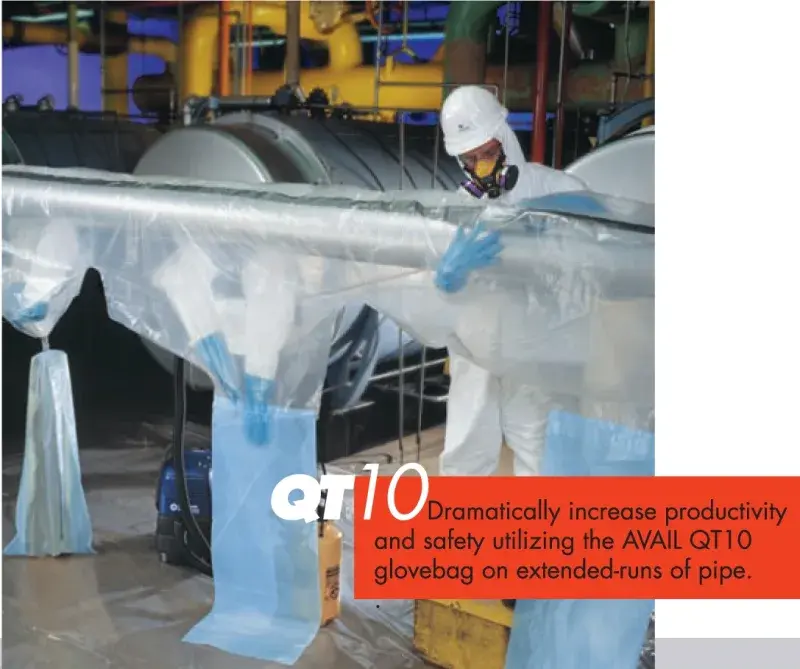
Glovebags are sealed containment systems specifically designed for small-scale asbestos removal, including pipe insulation, valves, and fittings. According to OSHA requirements, asbestos removal glove bags must be made of durable, transparent 6-mil polyethylene to ensure sufficient thickness and tear resistance. Each glovebag comes with a built-in pair of gloves that allows workers to safely handle asbestos materials while preventing the release of hazardous fibers during the removal process.
Key features of glove bag asbestos abatement include:
Pre-cut openings at the top: These save time by eliminating the need to manually cut and reinforce the ends with tape before attachment.
Seamless bottom construction: Ensures the glove bag won’t split or rupture under pressure.
Integrated tool ports: Allow safe connection to HEPA-filtered vacuums and sprayers.
Tight glove/sleeve seals: Maintain airtight integrity and ensure that glovebags are single-use, so contaminated materials can be securely sealed and disposed of after removal.
By using asbestos glovebags, asbestos abatement professionals can minimize the spread of asbestos fibers and maintain compliance with safety standards while carrying out removal tasks efficiently and effectively.
Step 1: Preparation Work
Before starting the asbestos glove bag procedure, workers must follow strict safety protocols to prevent exposure and contamination.
Put on full personal protective equipment (PPE), including disposable coveralls, boots, gloves, and a HEPA-filtered respirator.
Establish a regulated area using barrier tape, leaving enough space around the containment zone for safe work.
Post highly visible asbestos warning signs, as required by OSHA. If necessary, construct a decontamination unit consisting of an equipment room, shower area, and clean room.
Shut down HVAC and ventilation systems to prevent asbestos fibers from spreading throughout the building.
Lay protective sheeting over nearby surfaces to stop dust contamination.
Use a HEPA vacuum cleaner to pre-clean pipes and remove any loose asbestos dust before glove bagging asbestos begins.
Step 2: Setting Up the Asbestos Glove Bags
Before beginning work, carefully inspect the glovebag for any damage or defects. Measure the length of the pipe or insulation to ensure that the glovebag fits properly.
To install glove bags for asbestos removal:
Position the glovebag securely around the pipe or insulation that contains asbestos.
Use high-strength tape to seal all edges tightly. Make sure the tape adheres to the bag itself and not directly to the insulation.
Confirm that the built-in gloves and tool ports are fully sealed and airtight before starting the removal process.
Step 3: Checking the Integrity of the Glove Bag Asbestos
Before starting removal, it is essential to confirm that the glove bag is fully sealed.
Isolate the one glovebag chamber with strong tape. Insert a smoke generator through one of the glovebag ports and release enough smoke to fill the entire chamber. Remove the smoke generator and reseal the port.
Gently squeeze the glovebag and check carefully for any smoke escaping. Listen for leaks as well as visual signs.
If a leak is detected, seal all gaps with tape before proceeding. Loosen the clamp or fastener only after confirming the seal is secure.
Prepare the surfactant solution by pouring it into the sprayer. Seal all sprayer components tightly with tape at the glovebag’s intake port to prevent leaks.
Step 4: Safe Removal Inside the Bag
Once the glove bag has been tested for leaks, workers can begin the removal process. This stage is the core of the asbestos removal glove bag method, and it must be performed carefully to keep fibers contained.
Insert your arms into the built-in gloves and handle all tools from inside the enclosure.
Gently cut, scrape, or remove the asbestos-containing insulation, taking care not to puncture the glovebag.
Keep the material damp by spraying with the surfactant solution as you work. Wet asbestos breaks apart with less dust, reducing the risk of fiber release.
Allow all removed debris to fall directly to the bottom of the glovebag. Do not remove or transfer waste until the procedure is complete.
If additional cleaning is required, use a HEPA vacuum connected through the glovebag’s integrated port.
Step 5: Sealing and Disposal
Once the asbestos material has been removed, it is critical to properly seal and dispose of the waste.
Gather all asbestos debris at the bottom of the asbestos glove bag.
Twist the bag tightly just above the waste material and secure it with high-strength tape or a clamp.
Detach the glovebag carefully from the pipe or insulation, making sure the seal remains intact.
Place the entire asbestos removal glove bag into an approved, labeled asbestos disposal bag. Seal the outer bag securely with tape.
Double-bagging is recommended by OSHA and EPA standards for maximum containment.
Step 6: Cleanup and Decontamination
After removing and sealing the asbestos-containing materials, thorough cleanup is essential to ensure the work area is safe. This final stage completes the glove bag asbestos abatement process.
Use a HEPA vacuum to remove any residual asbestos dust from the work area.
Apply an encapsulant spray to remaining surfaces to lock down any fibers.
Carefully remove PPE, including coveralls, gloves, boots, and respirators, and place them in asbestos disposal bags for proper disposal.
Remove any protective sheeting, barriers, and warning signs once the area is confirmed clean.
Wash your hands, face, and any exposed skin thoroughly after handling asbestos materials. And you can also use an asbestos shower room.
Following these steps ensures that glove bagging asbestos is completed safely, leaving the workspace free of hazardous fibers and compliant with OSHA standards. Proper decontamination protects both workers and the surrounding environment from contamination.